

Chapter 2 - Cutting Latex
This is where form begins.
Cutting Latex is not difficult — it’s just… different.
It doesn’t fray. It doesn’t ripple. But it can stick, drag, or warp if you’re not careful. So let’s make it clean and confident:
It doesn’t fray. It doesn’t ripple. But it can stick, drag, or warp if you’re not careful. So let’s make it clean and confident:
What you will need:
The Basics
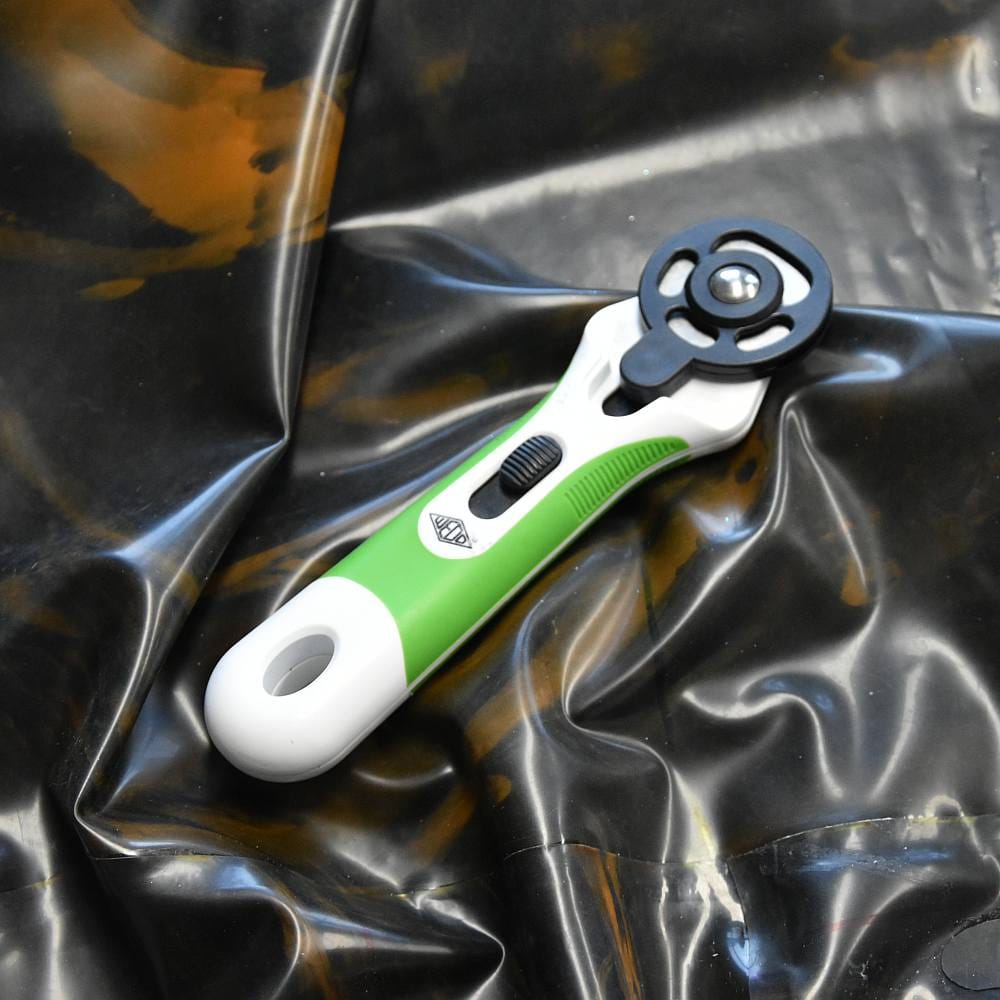
- Rotary cutter (sharp!)
and for little bits: a sharp pair of scissors - Cutting mat
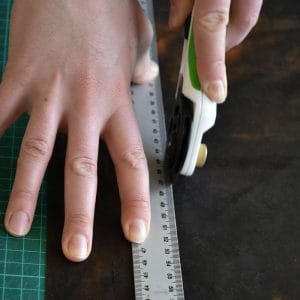
(self-healing one is the best) - Steel ruler
(not plastic — it slides and can be hit by the rotary cutter) - Fine-point marker
(like whiteboard markers or gel markers)
Nice to Haves
- Pattern weights
(no pins!) - A steady hand and a sharp mind
- Something good playing in the background
Technique tips:
- Blade sharpness is everything.
If it feels like you’re dragging — stop. Replace the blade. Dull blades stretch latex and make your edges wavy or ragged. - Use smooth, continuous motions.
Don’t saw or hack — latex prefers grace over force. - Press, don’t push.
Your hand should glide, not lean. Let the blade do the cutting — your job is just to guide.
Pattern placement:
- Use the cleanest, most even part of the sheet for tight or complex pieces (like bodices or sleeves)
- Again this: Avoid the outer ~5 cm and the marked spots from before for critical pieces
- Don’t forget the design — think about swirls, galaxy trails, or glitter spreads. A centered cut can make the whole outfit.
Pro Tip:
- Left-handed? Rotate your pattern — don’t twist your wrist. Ruka does it that way as well
- Small scissors are fine for trimming — not for main cuts
- Bonus: If you mess up? You didn’t ruin the sheet. You made a scrap for a future detail or patch. Nothing’s wasted.